General Information
Thank you for purchasing our theme. We are happy that you are one of our customers and we assure you
won't be disappointed. We do our best to produce top notch themes with great functionality,
premium designs and human readable code. Before you get started we highly encourage you to get
familiar with this documentation file. Spending half an hour reading the manual may save a lot of
your time and avoid questions with obvious answers.
If you have any questions that are beyond the scope of this help file, please feel free to send your
questions to our support email: bkninja.team@gmail.com. Our support team will reply you within 12 hours.
Please Note!
Our support covers getting setup, trouble using any features, and any bug fixes that may arise.
Unfortunately, we cannot provide support for customizations or 3rd party plugins. If you need help
with customizations of the theme, then you can contact us and we will offer you our customize service.
To use this theme you must have WordPress engine installed. We assume you have a working version of WordPress
already up and running. If not, you can check this great tutorial guiding you through the process of
WordPress installation.
How to install WordPress - A tutorial
on how to install WordPress on your hosted domain.
We also encourage you to actively use the links below. These useful resources cover most of general WordPress
questions you may have:
- Wordpress FAQ - Information and resources about
WordPress including history, features, semantics, glossary, and information to help you determine whether or
not WordPress is the blogging tool for you.
- Wordpress Lessons - Great source
of knowledge for WordPress beginners
- PHP Function References -
Detailed information on WordPress PHP functions and usage examples
To use this theme you must be running WordPress 4.0 or higher, PHP5.4 or higher. If you use hosting with limited resources (like the lowcost shared hosting providers), you may experience issues with one-click dummy data installation feature.
We recommend you to contact your web hosting service provider to make sure that your server PHP configuration limits are as follows:
- max_execution_time 600
- memory_limit 256M or 512M
- post_max_size 32M
- upload_max_filesize 32M
If you are running unmanaged dedicated server or VPS, you should check your php.ini file. Alternatively, you can edit .htaccess file in the root of your website and add the following values:
    php_value max_execution_time 600
    php_value memory_limit 256M
    php_value post_max_size 32M
    php_value upload_max_filesize 32M
Setting these values will ensure you will not get error messages during the installation. To safeguard your website, please use secure passwords and the latest version of WordPress and plugins.
IMPORTANT! To avoid any errors that might come up during the installation we recommend to have memory limit set up to 512M.
Here is the list of other recommended web hosting services:
A common issue that can occur with users new to installing WordPress themes is a "Broken theme and/or stylesheets missing” error message being displayed when trying to upload or activate the theme. This error message does not mean that the theme you have purchased is broken, it simply means it has been uploaded incorrectly. Luckily, there is a very easy fix.
Installing From the WordPress Dashboard
- Download the zipped theme pack to your local computer from themeforest and extract the ZIP file contents to a folder on your local computer.
- Log into your WordPress admin panel and click on the “Appearance” tab.
- Now click on the "Add New" button.
- Click on the "Upload" tab, click "Choose File" and select rubik.zip in the extracted folder then click "Open".
- Click the "Install Now" button.
- Activate the theme from this page by clicking "Activate", or "Return to Themes Page" and activate from there
Uploading via FTP
-
Download the zipped theme pack to your computer from themeforest and extract the ZIP file to a folder on your computer.
- In the extracted folder you will find 'rubik.zip'. Extract this file .
-
Using an FTP client to access your host web server
-
Upload the Theme files in the extracted folder called 'rubik' to wp-content/themes directory provided by WordPress.
-
Visit Admin panel -> Appearance -> Themes, look for the Rubik theme thumbnail, then click the Activate button to activate the theme.
Bulk Install Required and Recommended Plugins (recommended)
You can either install all the recommended plugins in bulk or individually select which ones you would like to install. We recommend installing all the recommended plugins.
-
Visit Appearance ▸ Install Plugins
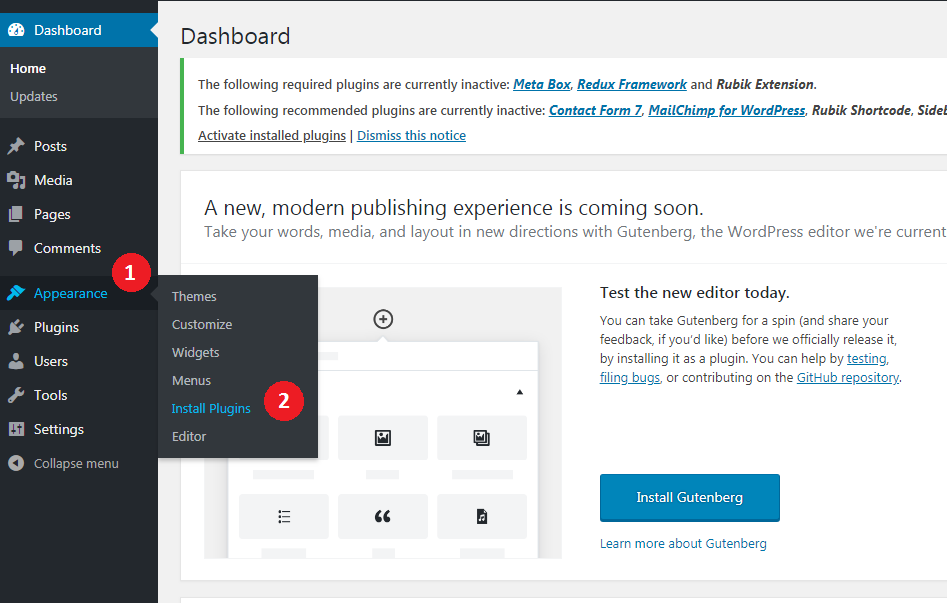
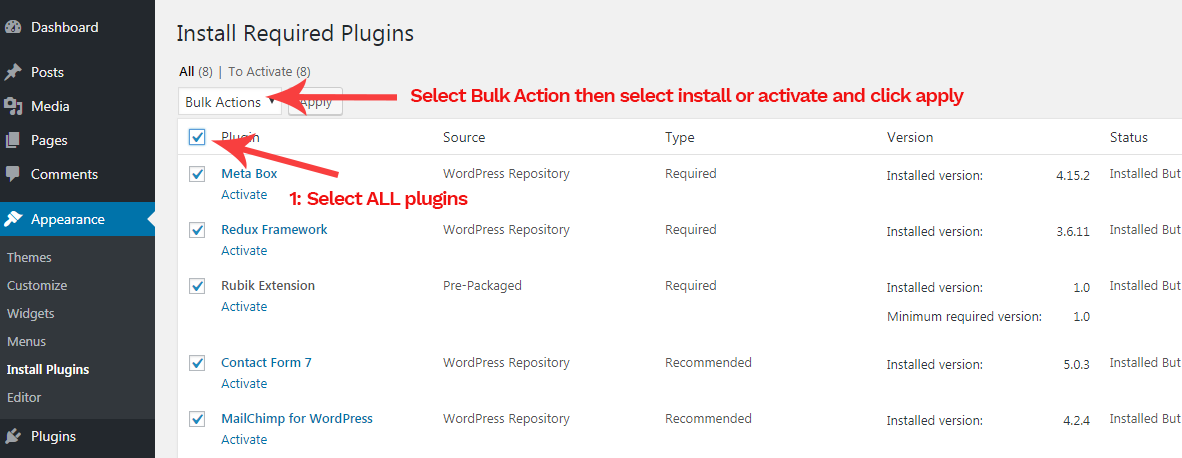
-
After you've selected the plugins you want to install, click "Install" under "Bulk Actions".
One Click IMPORT DEMO Panel
-
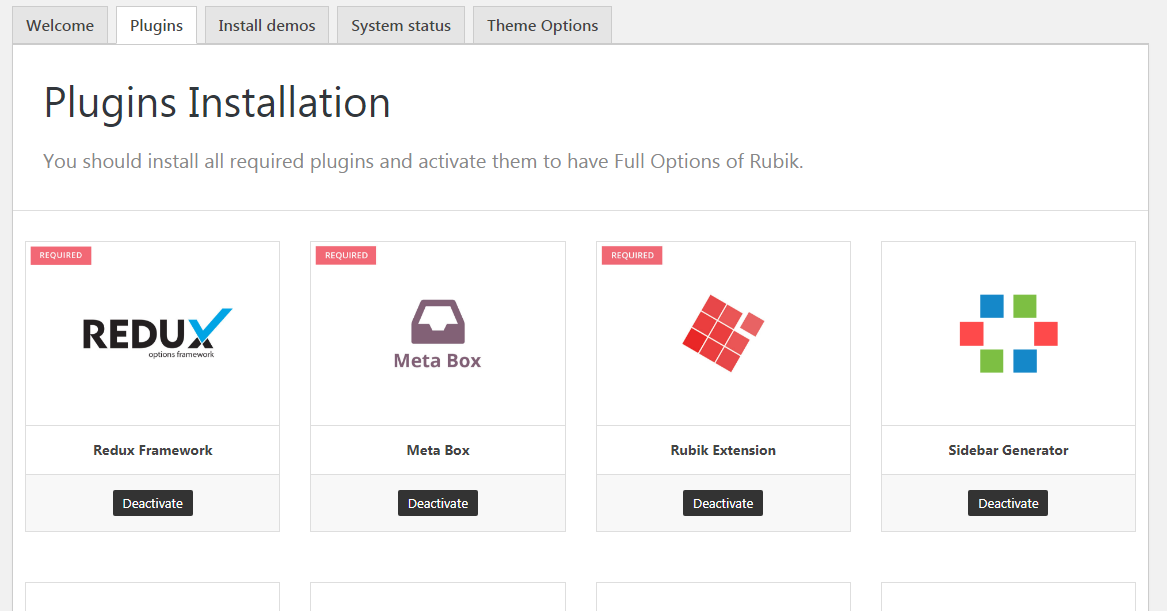
Plugins Panel
In this panel, you can easy to manage Install/Activate/Deactivate the plugins you want.
-
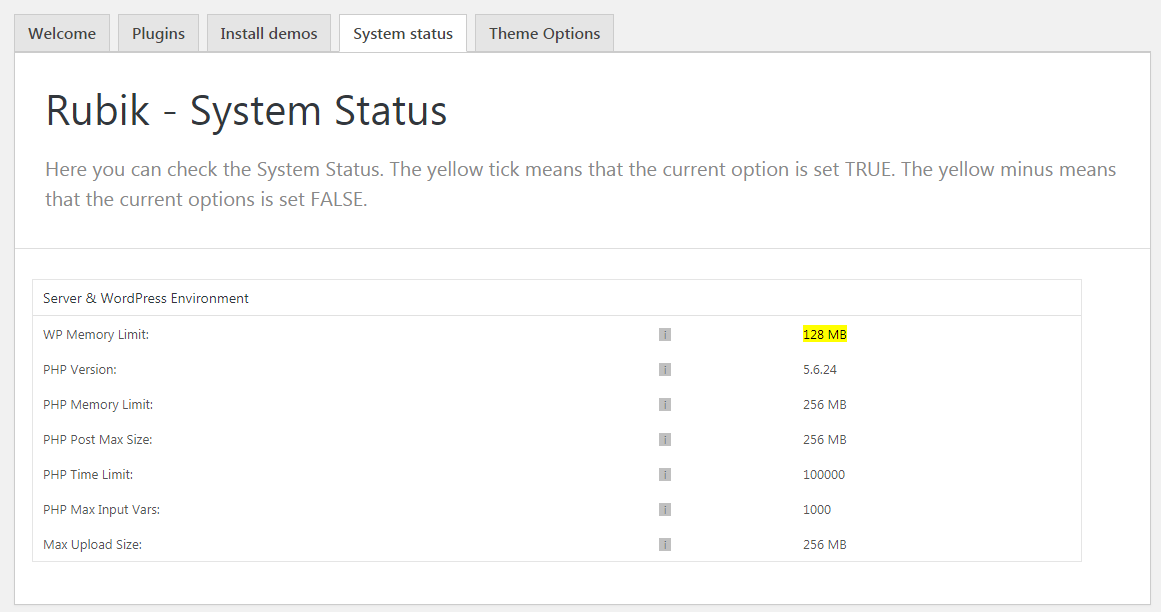
System Status Panel
This panel shows your system configuration. Please make sure that your server PHP configuration limits are as follows
- max_execution_time 600
- memory_limit 256M or 512M
- post_max_size 32M
- upload_max_filesize 32M
-
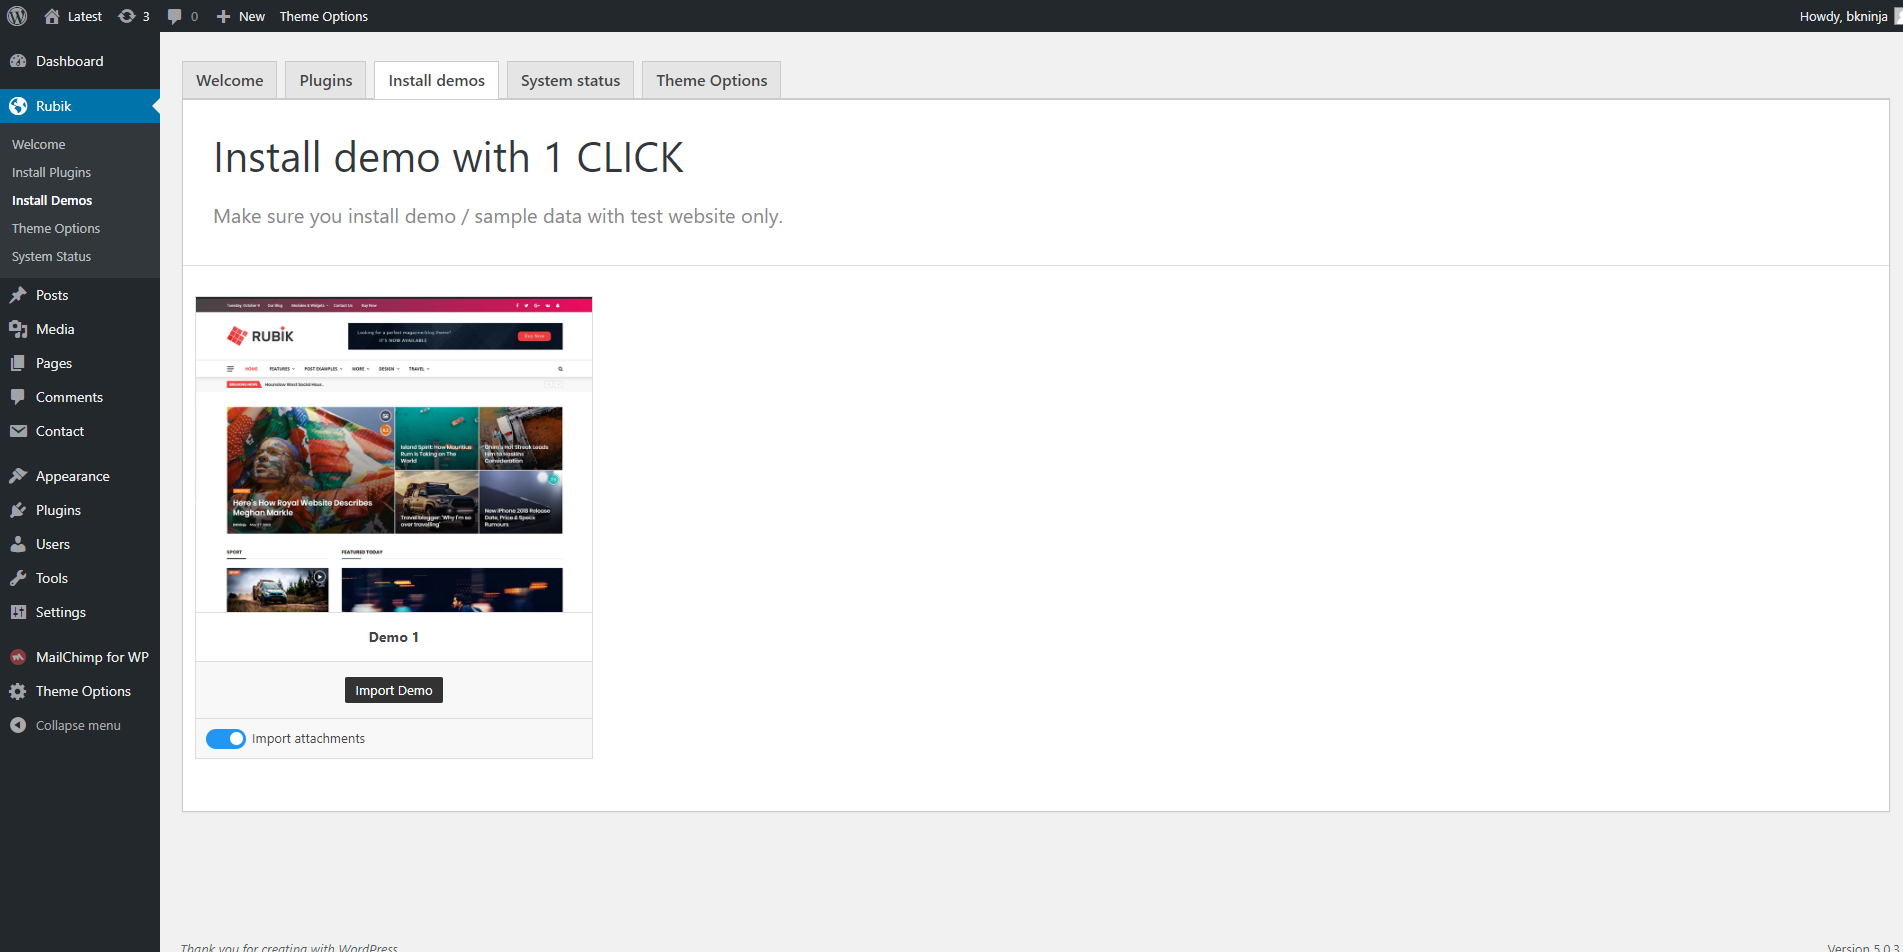
Demo Panel
After installing all requirement plugins, you should see this panel appears. In each demo, there is an option allows you to import the attachments or not.
Once all settings are ready, please click the Import button and wait until the import process done. Then you can go back and check your website.
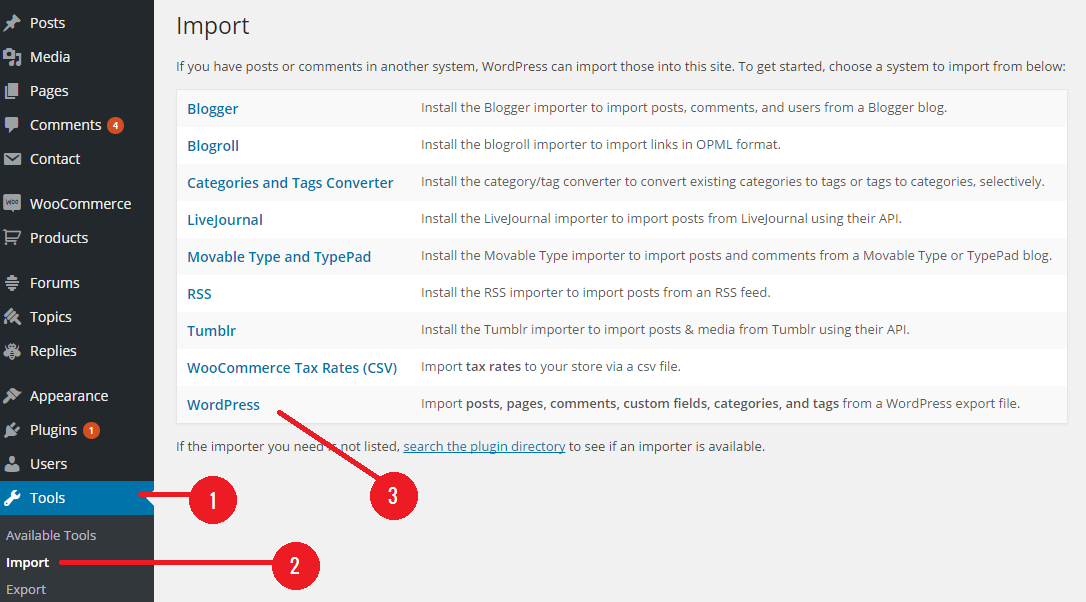
Manually Upload XML File
This Method will import posts, pages, menus only.
- Go to Admin panel -> Tools -> Import -> WordPress
- Install the plugin.
- Use it to upload the demo content XML file in the theme package.
1. Go to Dashboard > Tools > Import and Click on WordPress and Install it.
2. Choose a content_data.xml file from your download package and then click on Upload file and Import
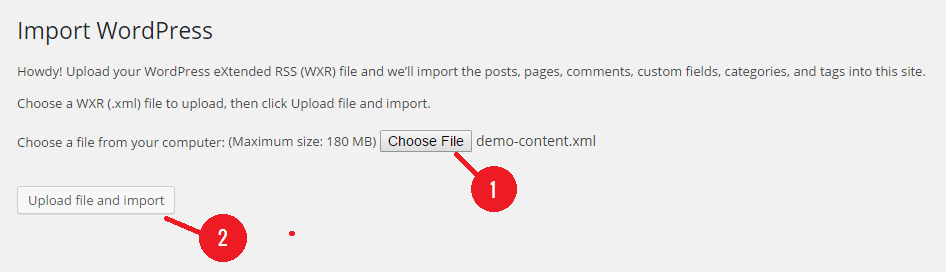
3. Assign Authors and start import, click on Submit
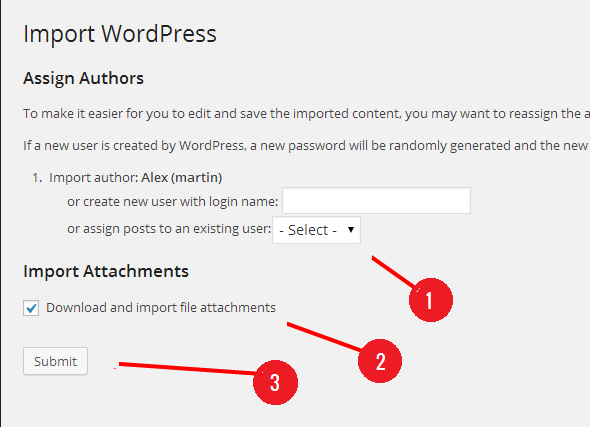
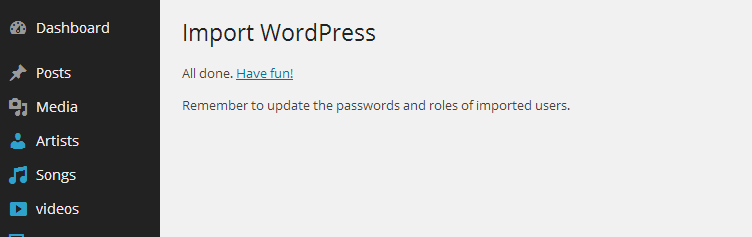
4. This process may take a while on some hosts, so please be patient. (some hosts between 5-6 minutes)
If you are migration from a theme which used the native featured images functionality of WordPress, please use the Regenerate Thumbnails plugin to resize all the thumbnails. Click the link above and download the free plugin, and read through the steps it contains, it has all the information you need.
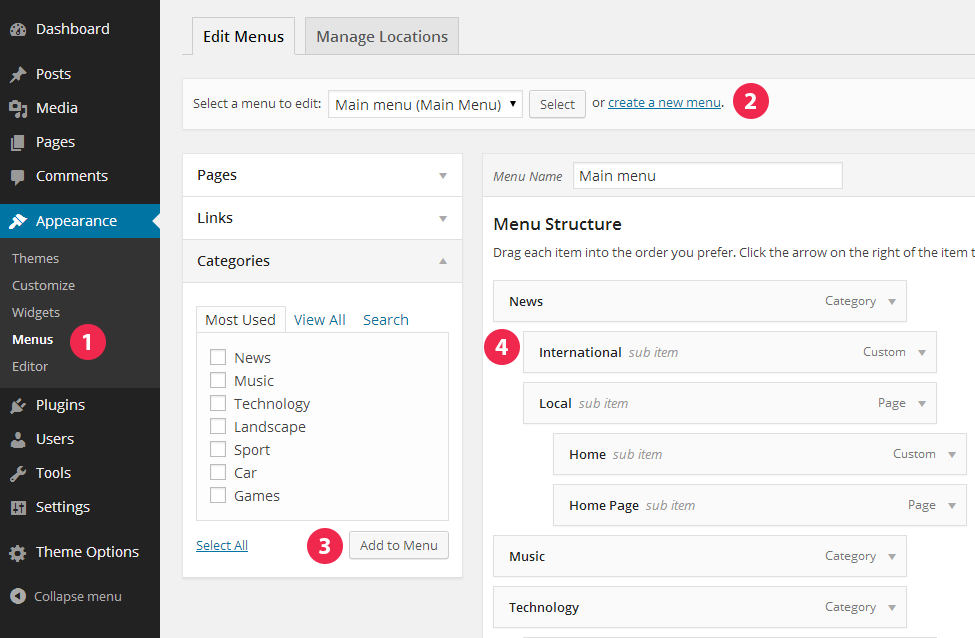
- Navigate to Apperance -> Menus page
- Click the "create a new menu" link to make a new menu. Enter the name then hit Create Menu
- To add a menu item, you can easily select one of your already made pages on the left hand side and click Add to Menu. You can also add menu items by entering a custom name and custom link into the Links box. To create a megamenu, see Categories Mega Menus.
- You can manage your menus using the drag and drop functionality. To create a dropdown menu, simply drag a menu item below and slightly to the right of another menu item and it will lock into place and create a dropdown section.
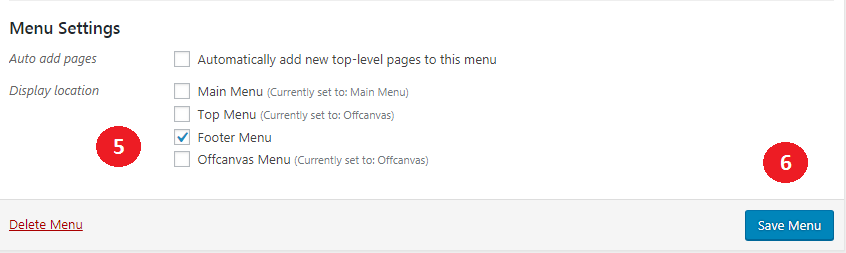
- After setting up your menu, select menu location in the Menu Settings (Top Menu for navigation in top bar and Main Menu for main navigation below header)
- Once its all done, make sure you click the Save button.
- You can change menus locations at any time from Manage Locations tab .
The theme features a mega menu for category menu items to display latest posts in the corresponding category
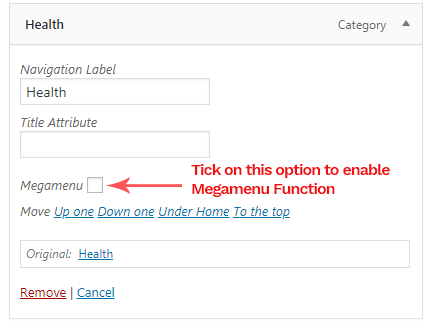
- Add the Category you want to the menu.
- In the setting panel of category menu item there will be a checkbox called BK Megamenu.
- Check it if you want to make that category menu item a megamenu or uncheck to make it a normal menu item.
- Don't forget to set the menu location to Main Menu by clicking checkbox Main Menu in Theme locations section of Menu Settings.
- Click Save Menu to finish.
Column Menu Settings
The theme features a mega menu for column menu items to display your features in the columns
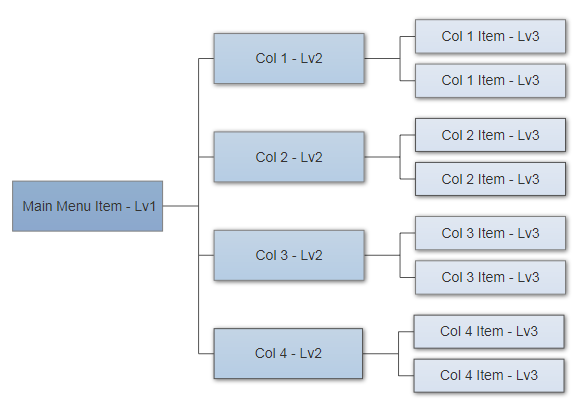
The Level 1 Menu Item should be the Main Menu Item, the Level 2 Items should be the Columns and the Level 3 Items should be the Column Menu Items.
Don't forget to enable Megamenu Function in the Main Menu Item Setting Panel
The theme supports a pagebuilder that you can easy build your content by drag and drop modules into the homepage sections .
Drag and Drop Homepage Builder
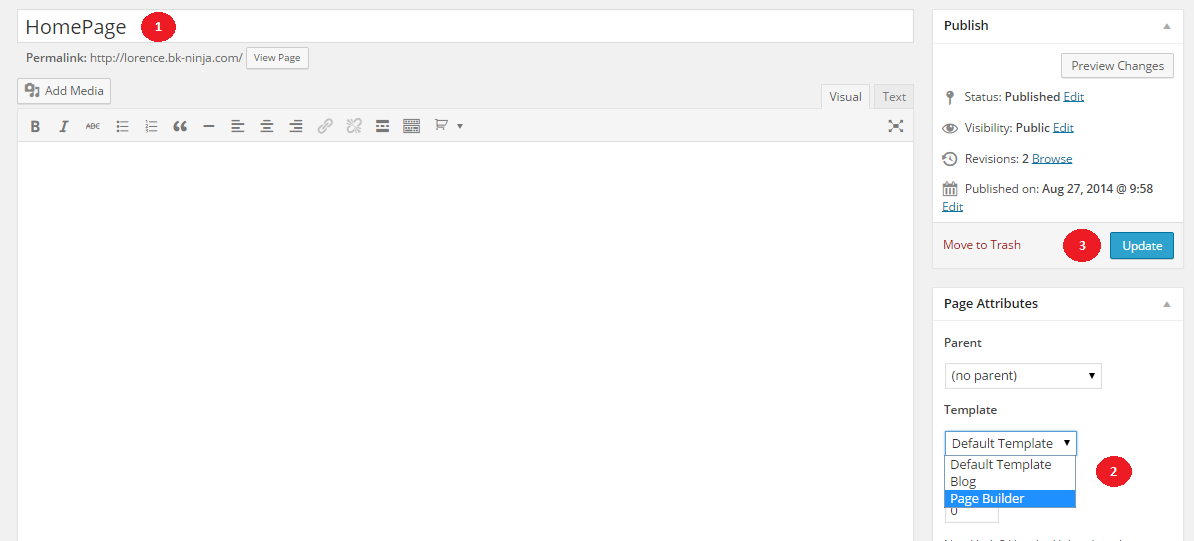
- Go to Admin panel -> Pages -> Add new to create a new page.
- Enter title for your homepage, example: Home Page. In the Page Attributes box, select Page Builder in Template option.
- Click Update
You will see the Pagebuilder interface like this.
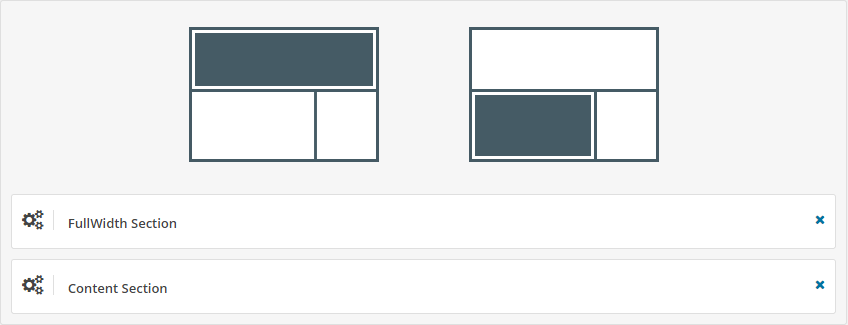
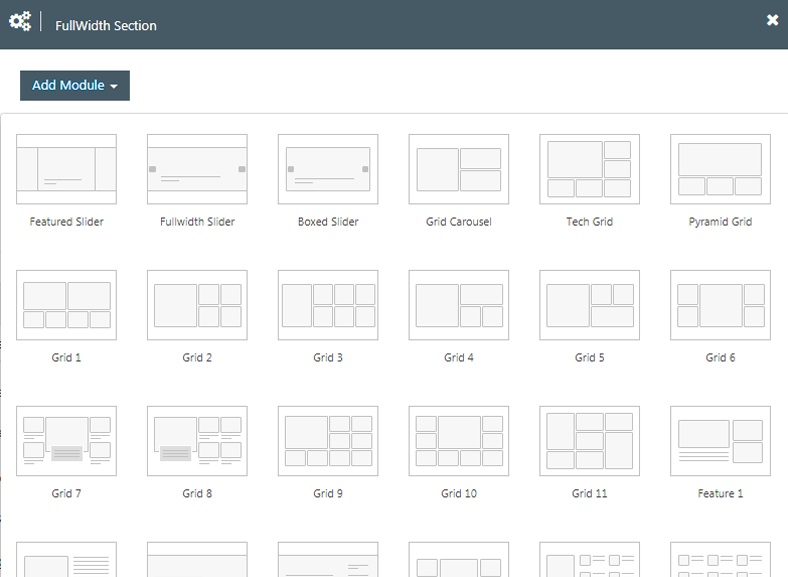
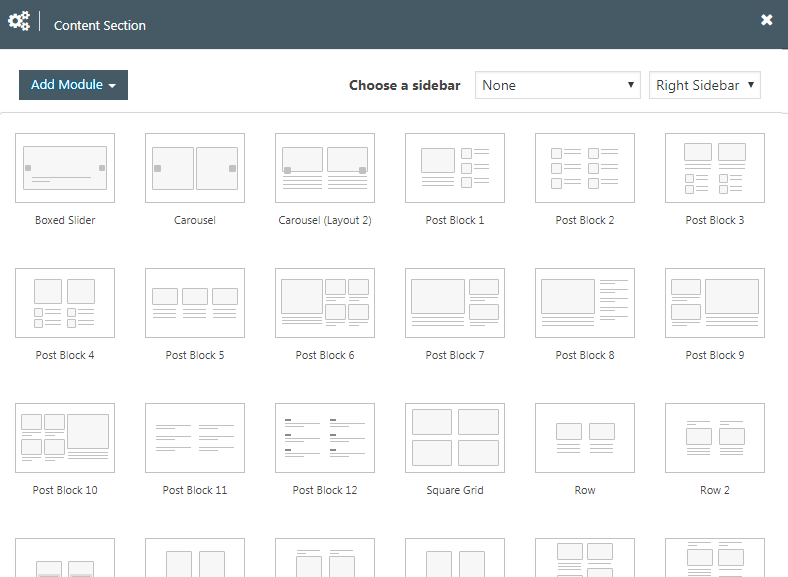
There are 2 sections:
- Fullwidth Section
- Content Section
Full Width Section: See all module demos Here
Has Sidebar Section: See all module demos Here
Setup front page

- Once you finish building the homepage content, go to Settings -> Reading to set up your homepage.
- In Front page displays option, choose A static page. In Frontpage option below, choose the page that you have just created in the steps above, example: Home Page. Click Save changes.
- Go to your site home url to check if your homepage has been set.
Step 1:
Step 2:
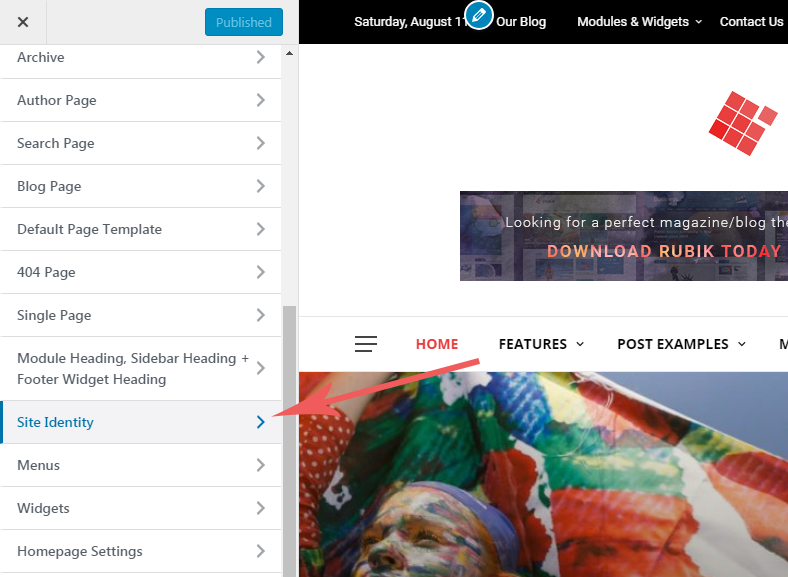
- Navigate to Appearance -> Customize .
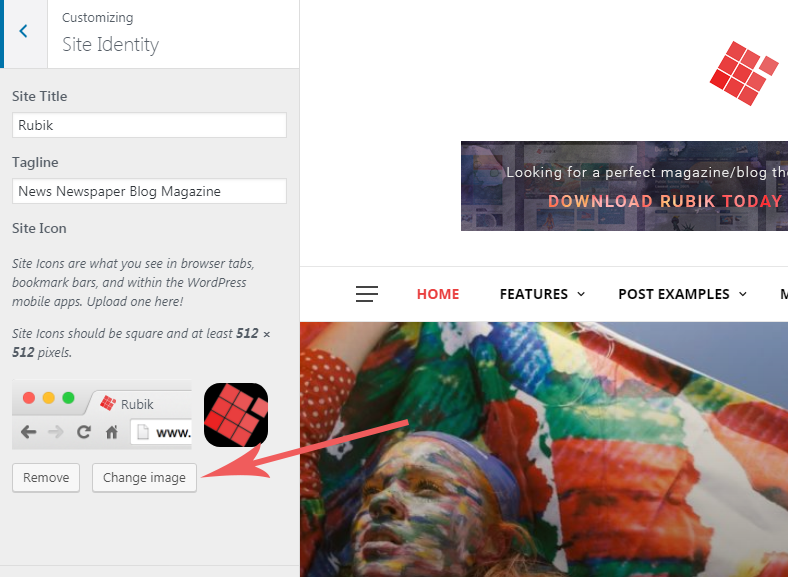
- Select Site Identity.
- Click Select Image then upload your Favicon image.
- Once uploaded click Save changes button to save your site Favicon.
Featured images for the posts
All of your posts should have a featured image .. this image will appear in the slider , post modules , sidebar .. etc
The recommended size for the Featured images is 1600px x 900px.
This theme crops all uploaded images to fit its places in the theme .. if you have any problems with the size of old images which uploaded before install the theme you need to use
Regenerate Thumbnails Plugin or
AJAX Thumbnail Rebuild Plugin to regenerate thumbnails with suitable sizes .
Subtitle Field
You can insert the subtitle of the post here

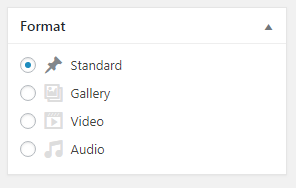
Post format
The theme support 4 WordPress post formats: Standard, Gallery, Video and Audio.
Gallery Format
When you select the Gallery Post Format, there is a Gallery Upload field appear that allows to upload the images to the gallery

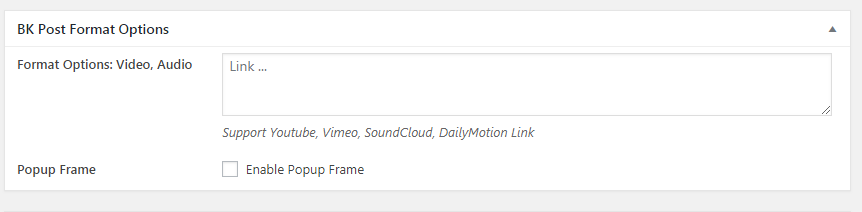
Video Format
When you select the Video Post Format, there is a Text field appear that allows to insert the video link
Add Review
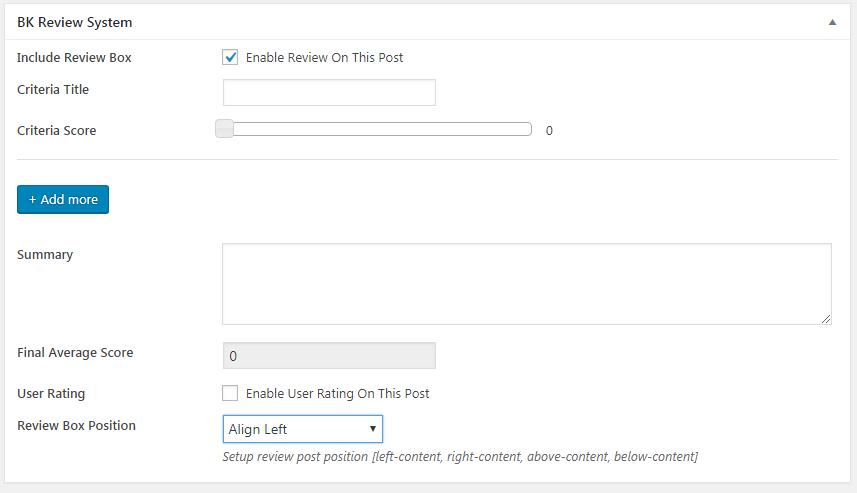
- From the BK Review System box in the post edit page .
- Tick the checkbox Enable Review On This Post. Then the review field will be shown
- Setup the criterias, you can add more criterias by click Add More button. This is unlimited
- Summary: Enter the Summary to the text field
- If you would like your reader can give their rating, then please click on the User Rating Check Box
- Review Box Position: The default option is under the post content, you can select another position like Align Left or Align Right Or Above the post content
Post Layouts
There are 17 Post Layouts that you can select for your Post.
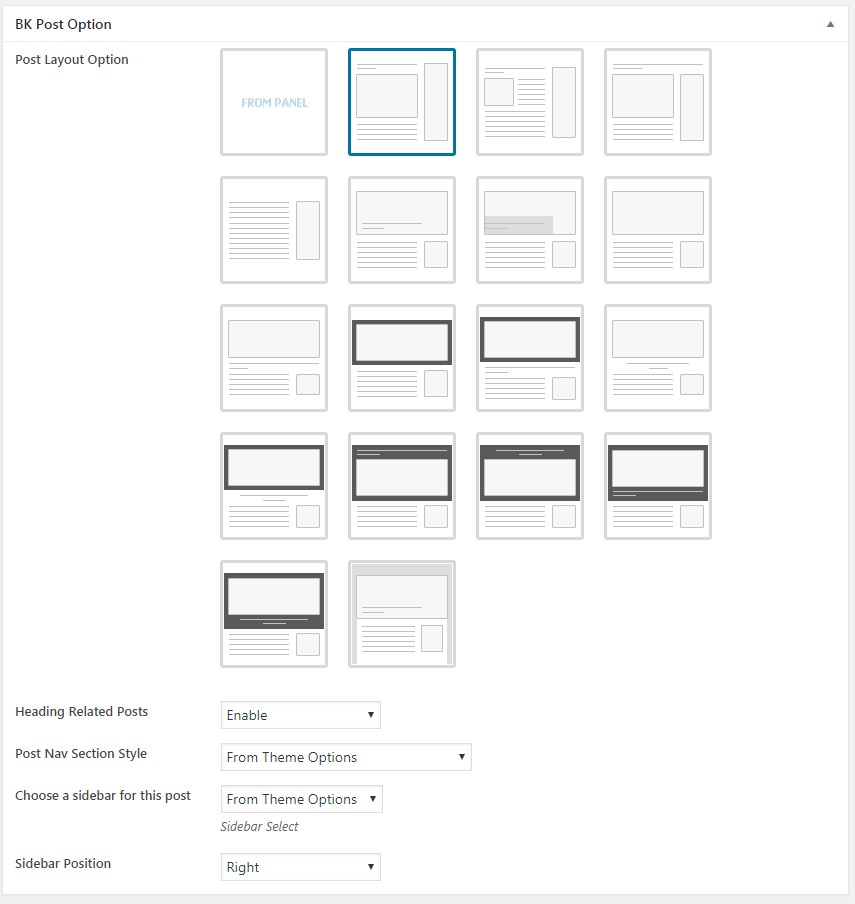
- Select a post layout that you would like for your post. If you select the default option, then the post layout setting will be get from Theme Option panel
- Enable/Disable Heading Related Post Section
- Post Nav Section Tyles: There are 2 types of Post Nav Section, you can select between "Under The Post Content" or "Fix on Left and Right Side" option
- Select a Sidebar for this post
- Setup Sidebar Left or Right
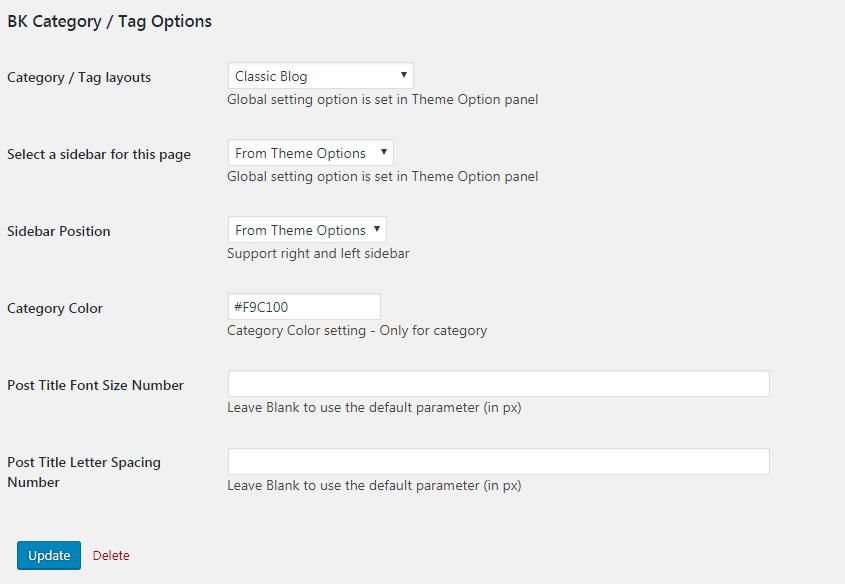
- Select a layout for the category/tag page
- Select a Sidebar for this page
- Setup Sidebar Left or Right
- Category Color: This is only applied for the category. This option allow to select a specific color for the category
- Post Title Font Size: Customize the post title font size, leave empty to use the default font size
- Post Title Letter Spacing: Customize the post title font letter spacing, leave empty to use the default number
-
General Settings
The general Settings of the theme
- Primary Color: this option allows to setup the main color of your website
- Site Container Width: Setup the container width of your website, there are 4 options: 1110px, 1140px, 1170px and 1200px
- Site Layout: Select between Wide or Boxed layout. If you select the boxed layout, then the site background field will be appeared.
- Enable sidebar in responsive layout: Show/hide the sidebar if the device is smaller than 991px
- Scroll Top Button: Show/Hide the scroll top button that should be appeared on the right-bottom corner of the screen
-
General Typography
Setup the Typography of the following elements
- Body Font
- Top Bar: Setup Top Menu Font
- Main Menu
- Meta Font
- Title Font
- Text Font
- BlockQuote:
- Blockquote Font: This option is used to setup the default blockquote and blockquote shortcode
- Blockquote Background: Only apply for the default blockquote
Default Blockquote: is in the < blockquote > tag
-
Small Post Settings
Setup the small post typography here
-
Pages in General
- Breadcrumb Setting: Show/Hide the Breadcrumb. If you select "Show", then there are some setting fields of breadcrumb will be shown
- Pagebuilder Setting: Setup the sticky sidebar of the Pagebuilder
-
Category
- Category page layout: This is the Global setting for layout of category archive page, will be overridden by layout option in category edit page.
- Category page Post Title Font Setup: Leave blank to have the default font setup
- Enable Post Icon on category page: Only support for "Classic Blog layout", "Large Blog layout" and "Masonry Layout"
- Sidebar: Choose sidebar for Category page
- Sidebar Position: Support right and left sidebar
- Stick Sidebar: Enable Stick Sidebar / Disable Stick Sidebar
-
Archive
- Archive page layout: Layout for Archive page and Tag archive.
- Archive page Post Title Font Setup: Leave blank to have the default font setup
- Enable Post Icon on category page: Only support for "Classic Blog layout", "Large Blog layout" and "Masonry Layout"
- Sidebar: Choose sidebar for Category page
- Sidebar Position: Support right and left sidebar
- Stick Sidebar: Enable Stick Sidebar / Disable Stick Sidebar
-
Author
- Author page layout
- Author page Post Title Font Setup: Leave blank to have the default font setup
- Enable Post Icon on category page: Only support for "Classic Blog layout", "Large Blog layout" and "Masonry Layout"
- Sidebar: Choose sidebar for Category page
- Sidebar Position: Support right and left sidebar
- Stick Sidebar: Enable Stick Sidebar / Disable Stick Sidebar
-
Search Page
- Search page layout
- Search Result Setting
- Search page Post Title Font Setup: Leave blank to have the default font setup
- Enable Post Icon on category page: Only support for "Classic Blog layout", "Large Blog layout" and "Masonry Layout"
- Sidebar: Choose sidebar for Category page
- Sidebar Position: Support right and left sidebar
- Stick Sidebar: Enable Stick Sidebar / Disable Stick Sidebar
-
Blog Page
- Blog page layout
- Blog page Post Title Font Setup: Leave blank to have the default font setup
- Enable Post Icon on category page: Only support for "Classic Blog layout", "Large Blog layout" and "Masonry Layout"
- Sidebar: Choose sidebar for Category page
- Sidebar Position: Support right and left sidebar
- Stick Sidebar: Enable Stick Sidebar / Disable Stick Sidebar
-
Default Page Template
This page can be created by the following steps:
- Create a New Page
- Select the page template as default page template
- Setup the page featured image
- Click Publish
Page Options:
- Feature Image Show/Hide: On/Off
- Layout
- Page Sidebar: Choose sidebar for Category page
- Sidebar Position: Support right and left sidebar
- Stick Sidebar: Enable Stick Sidebar / Disable Stick Sidebar
-
404 Page
- 404 Title
- 404 Description
- 404 Search: Enable Search / Disable Search on 404 Page
- 404 Latest Article Section: Select Enable this section, then the related setting fields will be displayed
-
Single Page
- Single Page Layout: The theme supports 17 layouts for the single page. This is the Global setting for layout of category archive page, will be overridden by layout option in the post setting page.
- Single Heading Related:
- Enable/Disable Option
- Setup the Single Heading Related Posts Entries
- Single Post Typography Setting: Customize the typography of Post Title, Post Content here
- Single Sidebar: This section supports to setup the sidebar of Single Page. You can select a specific sidebar here, setup sidebar left/right, and enable/disable sticky sidebar
- Insert Open Graph Meta Tags to Header: If you use a 3rd SEO plugin, then you should disable this option
- Enable/Disable share box on top of the post content: In this section, you can enable/disable the share item you want. Beside that, you can also edit the text that should be shown next to the social icons
- Enable Share Box Under The Post Content: Similar to the Social Share on Top of the post content
- Enable/Disable author box
- Enable/Disable post navigation
- Single Post Nav Style: There are 2 styles that you can select. Under the post content or "Fixed on the left and right side"
- Post Nav Font: The theme supports to change the font size of this section
- Enable/Disable related posts section: In this section you can setup the following fields:
- Related Posts Output: Select number of Posts that should be shown in this section
- Related Section Post Title Font
-
Enable/Disable comment section
- Recommend Box Setting: This section supports to customize the recommended posts that shown on the bottom of Single Page
-
Module Heading, Sidebar Heading + Footer Widget Heading
- Module Heading: The theme support 13 module headings. You can select one, then customize in details (Typography, Color, etc.) in this section
- Sidebar Heading: There are 27 sidebar heading that supported by the theme. Please select one, then setup in details (Typography, Color, etc.) by the fields in this section
- Footer Widget Heading: There are 18 footer sidebar heading that supported by the theme. Please select one, then setup in details (Typography, Color, etc.) by the fields in this section
Import/Export
This is the Import and Export Tool of the theme option setting panel.
Here you can copy/download your current option settings. Keep this safe as you can use it as a backup should anything go wrong, or you can use it to restore your settings on this site (or any other site).
You should install the "shortcode" plugin (can be found in Appearance -> Install Plugins) to use the shortcode supported by the theme
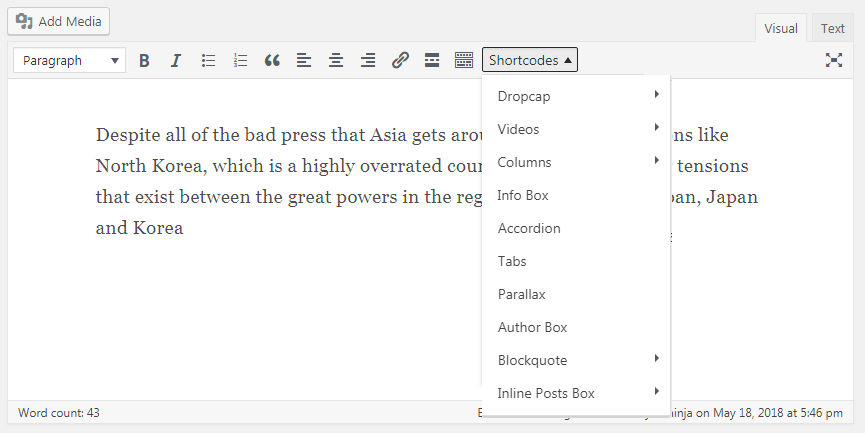
You can use these shortcodes in post/page editor
- Dropcap: The theme supports 2 dropcap styles
- Video: Including Youtube shortcode, Youtube Playlist shortcode and Vimeo shortcode
- Columns
- 1/2 1/2
- 1/3 1/3 1/3
- 2/3 1/3
- Info Box
- Accordion
- Tabs
- Parallax
- Author Box
- Blockquote: The theme supports 3 Blockquote styles
- Inline Posts Box
The theme also supports these shortcodes that can be used in shortcode module of the pagebuilder
This theme may be updated periodically in order to add new features and fix bugs. When a new update be available an update message will appears on your WordPress dashboard . As a customer, you can download the most current version from your ThemeForest account.
Updating Automatically
Envato have developed the Envato Toolkit Plugin for WordPress.
You can use this to receive notification of updates to themes purchased from ThemeForest
and to automatically update (upon clicking) directly from within your WordPress admin area.
- Download the plugin zip file to your computer.
- In your WordPress admin area, go to Plugins -> Add New then click Upload.
- Click Choose File, select the plugin zip file you downloaded and click Install Now.
- After installation, click Activate.
- Click the new Envato Toolkit link in the menu and follow the instructions to configure the plugin.
Updating Manually
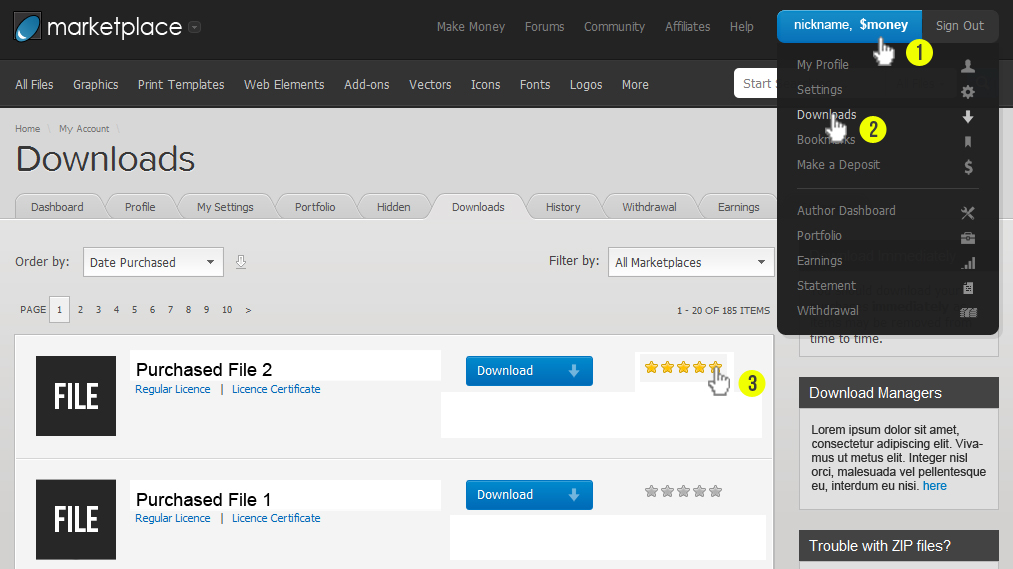
- Download the most current version from ThemeForest in the "Downloads" area of your account.
- Unzip the package and locate rubik.zip in the theme folder.
- Go to Appearance -> Themes and activate another theme such as the default WordPress theme.
- Delete Rubik theme which is now inactive.
- Go to Install Themes -> Upload then install and activate rubik.zip from the new package.
Rubik theme is able to be translated into any language. The process of translating the theme is a user responsibility. The following instructions are given as guidance.
- The first thing you need to do is to make sure that the theme has the appropriate language file. The rubik language files and eventually, the bonus ones are located in the theme's directory in the /languages/ directory. It's .pot file.
- If you don't find the appropriate language file for your target language then you must copy the rubik.pot file and rename the copy accordingly to your desired language. The language files names must have this format "ll_CC", where "ll" is an ISO 639 two-letter language code (lower case) and "CC" is an ISO 3166 two-letter country code (upper case). The country code specification is not redundant: Some languages have dialects in different countries. For example, ‘de_AT’ is used for Austria and ‘pt_BR’ for Brazil. The country code serves to distinguish the dialects. See Language Codes and Country Codes for the lists of codes.
- So let's say you want to translate to Brazilian Portuguese and you have copied rubik.pot to pt_BR.pot. Now you have to edit it using the world's favorite free .pot editor, PoEdit (http://www.poedit.net/download.php).
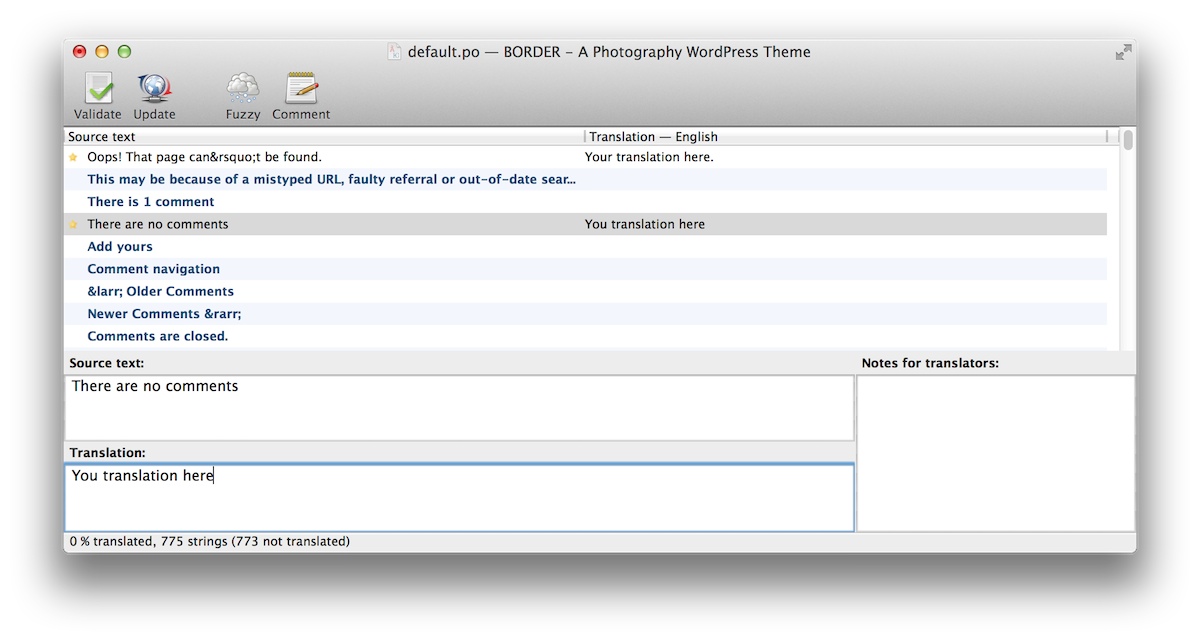
- Once you open the file you will be presented with the list of all the English strings on the left side and their translation (if present on the right). To translate simply click on a line and on the bottom of the window, you can enter your translation. More info here: http://en.wikipedia.org/wiki/Poedit
- Once you are done simply hit save in PoEdit and this will automatically save the .pot file and generate/regenerate the .mo file (a binary file).
- Now all you have to do is change the language of your WordPress installation. To do this you need to go to Settings -> General -> Site Language and choose your appropriate language.
You can reopen the .pot file at any time and change, continue to translate, etc.
All done.
Your WordPress installation should be in the language you intend on using the site.
If you have any problem with the theme, you can post your question on ThemeForest comment section or email us at bkninja.team@gmail.com. We will try to answer as fast as possible. Our timezone is GMT +7.
If you like this theme please help us rate it 5 stars on ThemeForest by following the instruction below. We appreciate your kindness so much!